Sunday, January 24, 2021

Using a Longarm!!

 This post is extremely exciting as it demonstrates a new skill being learned!

My friend and neighbor, Bev, has been challenging and encouraging me to try her longarm!!!  Scared stiff?  You bet!!

This was not easy!!!!  What do you do when you’ve quilted using a domestic sewing machine or a sit down longarm for 12 or 13 years!?!?!?  Well, you go to Joann’s and by a 90” x 90” piece of muslin on sale and quilt your little heart out!!  And I did!!  It took several sessions before I would risk quilting a quilt on my own but it was time to give it a try and learn to accept less than perfection!  Not that I’m perfect, but definitely particular!

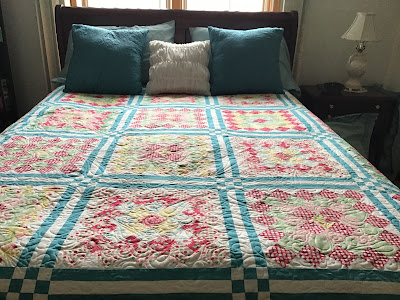
Here’s the first one; I completed this quilt top several years ago!  It was made with a jelly roll along and some background strips. For quilting,  I used a hook with scallops for the inner portion and feathers on the outside.   Now that took courage if you know me!!  But they’re not bad!


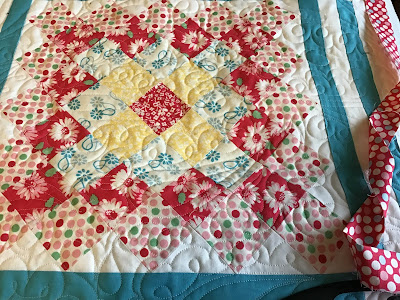
Bev spent quite a bit of time on a kit she was given and asked me quilt this paisley design taken from Whirls and Swirls out of Canada.  I love these and use them often for an all over design.


Bev loves her finish and is working to get it bound right now 

Here is a drawing of the two designs used:


The moral of the Story????  Never be afraid to try something new, whether it be free motion quilting or taking it to a frame!!  It’s all fun!!!

See you next time!  

Follow me on Facebook at Penny Olive, Free Motion Quilting Educator 
And 
On youtube.com under Penny Olive. 


Tuesday, January 19, 2021

Pin Cushions and Thread Catchers!

 The nice thing about a blog is that you can post whatever suits your fancy!  So today I’ll introduce my somewhat new friend!

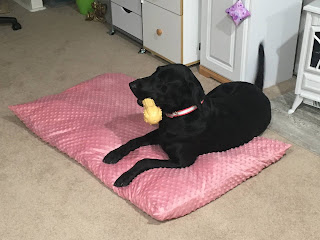
Meet Pearl!  Our former faithful companion, Cowboy, whom some may have seen in posts or on videos, passed away more than a year ago.  It was very difficult as the final year of his life was tough.  So we decided we weren’t ready to give our hearts to another for awhile.  But, this past fall we learned about Pearl and she won our hearts!!  Pearl is a hunter and truly never stops moving except when she’s exhausted; even then it takes effort. But she brings great joy to our hearts and we absolutely adore her lively and happy personality.


Now that you’ve met Pearl, let’s talk sewing!!!!  I have gotten fixated on thread catchers!!!  It started with this one given to me some time ago by my friend, Debbie.

I absolutely love it, but I got sooooo frustrated, as it kept falling off where I set it.  After several years, I added some shelf liner and “presto”!  Not only does it not fall off, but it stays open much better as well!


So then I started looking at pin cushions I already had.  I love pin cushions!  But none of those had a thread catcher!  And I loved this thread catcher!

This was the first one:  I had made three, two to give away in December:  one at the annual pin cushion giveaway during our Christmas  Sewing Club  at the Sewing Center of Cheyenne, one to give to my friend and neighbor, Bev, and one to keep.


The only problem was, I couldn’t add a thread catcher because it was too big to fill with weight, so it only had stuffing.  But it was a good time to see what could be done.  After adding some weight on the bottom and using Annie’s soft and Stable in the catcher for stability, I ended up with a huge, but pretty useful pin cushion/thread catcher. 


Bev loved hers too and calls it monkey because from the back she sees the face of a monkey (see third picture down)


For hers, Bev gave me a gorgeous pin cushion that reminded her of my Singer Featherweight.  So this  time I got out a combination of wool and felt from my stash and did another.  Absolutely love this one.


Each of these pin cushions were made with an outer fabric cut at approximately 9” x 17”. The inner was either the same size or cut at 10” so I could fold it over the outer fabric.  But I needed to make one more and see what would happen if it was shorter.  So I took a pin cushion I had made from a free pattern on Laundry Basket Quilts years earlier and cut it only 6” x 17”.  Once the bottom was made, it was pretty shallow in depth, maybe 3 1/2 to 4”. But I like it.  I don’t have to dig inside to pull out the threads and trash.  This one was made completely from wool. I think I prefer felt but I do like the way it sits.


So if you want a break from quilting or would just love to try a thread catcher, be inventive and give it a try!  Finally, here are some of the other pin cushions I’ve received from our annual pin cushion giveaway at sewing club.  I made the iron for my first giveaway.  I always make sure I get to keep one.  These ladies are creative!  See you next time and have fun quilting!!!


Saturday, January 9, 2021

2020 Christmas Wrap Up!

Christmas has passed and everything has been put away.  Well....almost everything.  My husband, John, and I love to sit in our sunroom in the morning with our coffee.  It's still dark and we both love lights, so we left them up on the patio until the hail arrives, which will probably be about May or June.  

This was  the first time in many years that I was actually able to enjoy making homemade gifts and some treasures for my home.  It was delightful!  Credit goes to the pandemic!  Yes, I'm thankful that there wasn't as much running around and things to do; I enjoyed the rest and staying more at home.

It started with embroidery.  I really enjoy embroidery, and even more, combining it with free motion quilting.  This year I got to do both:  In the hoop, wallhangings, a table runner!.  It was great! It started with some gifts for friends:


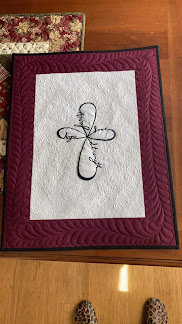
Then a friend had drawn a specific design she had seen and wanted a wallhanging for her bedroom.  It took some time, but I finally found what she wanted in an embroidery design. It really wasn't for Christmas; she had asked for it almost a year ago!  But the time was right so it was time to "get it done".

That wallhanging got me motivated to do a special gift for a precious friend with whom I do a weekly Bible study.  I absolutely love how this turned out.    The design was from Embroidery Library.  It looks fancy but was actually a pretty quick project.

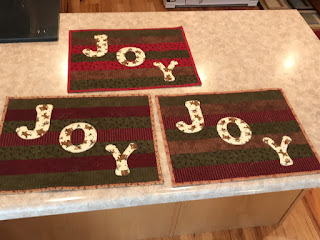
For our home, we needed some new placemats.  OK, not "need", but it was time!  These were from leftover jellyroll strips from a fall quilt I had made. They were more Christmasy so I had left them out of the quilt. I wanted something for every day use so they're not fancy.  But!  They were too plain with just strips so I worked with some alphabets and enlarging on the copier and added some appliqué. The finish is kind of country and nice.

After seeing something a friend was doing, the Missouri Star Quilt Company half-hexi template came out of hiding for a few more placemats.  Gingerbread men and snowmen have a special place in my heart!


My Christmas stocking needed replacing after an accident last year with a bottle of Kombucha that exploded!  I found a stocking black line drawing that I liked on Pinterest and then enlarged it and adjusted it just a bit.  After adding some diagonal strips and a little embroidery, it was set to go!  


And what Christmas would be complete without some free motion!  This table runner combined embroidery and free motion. The design is from Embroidery Library.   It took forever with the intense scribbling, but I absolutely love it!  It's totally me!


I hope you had a wonderful Christmas and holiday season, although it did have its difficulties.  Most of all I enjoyed having my son home from law school.  This will be his final semester and I don't know what will happen then, so I'm enjoying every moment!  Let's look forward to this year and the opportunities that will come to encourage each other!

Thursday, January 7, 2021

The Jelly Roll Race Free Motion Quilting Quilt Along!

The response to a Jelly Roll Race Quilt challenge on my Facebook Page and YouTube was great so we are going to do it! First let’s get our quilts completed and sandwiched, before the first free motion post next Wednesday, the 13th.  I still prefer to spray baste my quilts, but this is an easy one to pin baste since we are quilting by rows. Longarmers will have a great time joining in on this one as well!

Starting next Wednesday, I’ll go through a modified version of my Quilting Calisthenics with designs you can use on your Jelly Roll Race quilt, once you doodle them, of course.  I’ll also include additional designs for those with more control or experience with free motion.

Here are links to three Jelly Roll Race Quilts on YouTube by Missouri Star Quilt Company but you are welcome to use any pattern or process you like.  

1.  Making a Jelly Roll Race with Jenny Doan of Missouri Star:  https://youtu.be/2bEJLnaZQOU

2.  Jelly Roll Race II:  https://youtu.be/9w9UOFj0CSo

3.  Jelly Roll Race 3.0:  https://youtu.be/BY4tEEpyhX4

I used a roll called Sturbridge by Kathy Schmidt.  What was I thinking!?!?!?  There’s no color!!!  Oh well, I’m up for a challenge and will complete the Jelly Roll Race II using squares of teal thrown in to help wake it up.  Thanks, Linda, for the color help!

So how about some working photos!  First, to get my fabric ready!!


Don’t forget to get a fresh needle, put your 1/4” foot on, fill up some bobbins and clean up before starting! (psst.:  now that I’m done I found out it only took me one bobbin although I might need some from a second to put on the borders)  


Over 1600” of strips and squares stitched together!
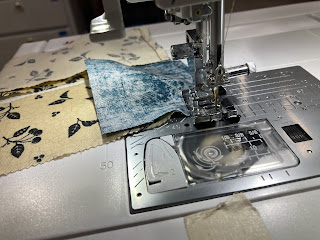


Now it’s time to put my stitching into rows.


And finally the finish!  I absolutely love this!  The teal is awesome!  I think I made a mistake with how I stitched the two rows and two rows to make four.  That caused the gap on the diagonal up the middle but I love it!  I think I’ll add a small teal inner border with a 3-4” outer border and call it a finished top!

Now it’s time to gather the backing, which I may piece with large scraps, and then sandwhich my Jelly Roll Race Quilt and hold it for Wednesday!  How are yours turning out??  

Follow me on Facebook at Penny Olive, Free Motion Quilting Educator and on YouTube under my name:  Penny Olive.  


Saturday, January 2, 2021

I’m BACK

 I’m B A C K !!!!


Yes, it’s been some time since my last post; Facebook, YouTube and teaching have been time consuming!  But after taking some time to assess things,  I’ve decided it would be a good thing to major on my blog and YouTube with Facebook being a tool to link individuals to those sites.  

So look for the stories on the quilts I’m doing; some will link to Facebook and YouTube posts but many will not.  

This quilt is something I will be combining with both Facebook AND YouTube and it’s a fantastically fun quilt!

Have you learned the basics of free motion but are afraid to do your designs on a quilt?  Here’s a fun way to get over the fear.

I looked up Jelly Rolly Race quilts on YouTube and found several tutorials on how to complete one.  I picked one from Missouri Star Quilt Company and then pulled out one of their many jelly rolls I had on hand from their Daily Specials.  The one I chose was a Stonehenge from Northcott fabric.  Here’s what I ended up with.


Once it was put together and sandwiched, I started in the center row of the quilt so there wasn’t too much drag and picked a different beginning quilting design for each row.  There were a few more advanced designs added in too.  Here are the results


Of course, I had to add in feathers on the outside border!


The finish is great.  I use this as a sample now when I do my Basic Free Motion Quilting Class.  

I’ll be announcing a quilt along, using the same process, on my upcoming Facebook post; the videos will be on YouTube. You are welcome to join us!

You can find me on Facebook at Penny Olive, Free Motion Quilting Educator and on YouTube.com under Penny Olive.  


Friday, April 27, 2018

Wool Applique Quilt!

This customer quilt is totally amazing!!

Jayne shared with me how much she loves doing hand work.  So, I said, the appliqué on this quilt IS done my machine, right?  Oh no, was the response, I do that all by hand.  By hand?  It's almost perfect?!?!  Although this quilt was a kit purchased from Keepsake Quilting, I have never seen such beautiful handwork.  It is stunningly beautiful!!  I was very humbled and scared stiff at the thought of being responsible for the quilting.  But Jayne is actually a very humble woman and I loved just visiting with her.

Our agreement was not to rush, but to finish the quilt with primarily feathers and pebbles.  She brought the bottom layer of batting and I added a layer of Quilter's Dream wool.  After debating, it was decided to use Superior Threads Bottom Line in both the top and bobbin threads.

After sandwiching the quilt, the first step was to stitch in the ditch of the major blocks.  Then....edge stitch around every single pice of appliqué.  Every single piece.  Uhhhhhh, every single piece!!!! Wow!!!!

Now I could begin the background stitching, flowing from block to block.  Here's what we ended up with.  Every block spoke for itself so although there are feathers and pebbles throughout, every block is quilted differently.


The half square triangles were stitched with a 1/4" curve on each of the sides of the cream fabric.  And for the outer border?  Feathers most definitely!!!  Rather than just connected feathers all around the quilt, I started at both the top and bottom and took them around to meet at the sides of the quilt.  


I have to admit that this was an enormous undertaking but this quilt is totally me and I thoroughly enjoyed quilting this beauty for Jayne.  And she is totally thrilled!!

Hope you enjoyed this one!  I know I did!  Be sure to check out my Facebook Page for all things free motion!  You can find me at Penny Olive, Free Motion Quilting Educator.

Have a super quilty weekend!