QUILT CLUB!
Wallhanging / Table Mat
Yes, today is Quilt Club over at Blakeman Vacuum & Sewing and I have been busy this week getting ready for all the busyness! Last month we swapped 5" charm squares so this month I planned to show a few things that can be done with charm squares.
The first and easiest, is a simple wall hanging or table mat. I took some charm squares I had received and made a simple nine patch block. Then I grabbed out my Sizzix and cut a few flowers and leaves with four more charm squares. Sandwich with a piece of batting and backing, add a little free motion, bind and voila! We are also doing a spring gift exchange this month so this little treat accomplished two purposes at once.

Fabric Trays
Another charm square project is this ADORABLE little fabric tray.

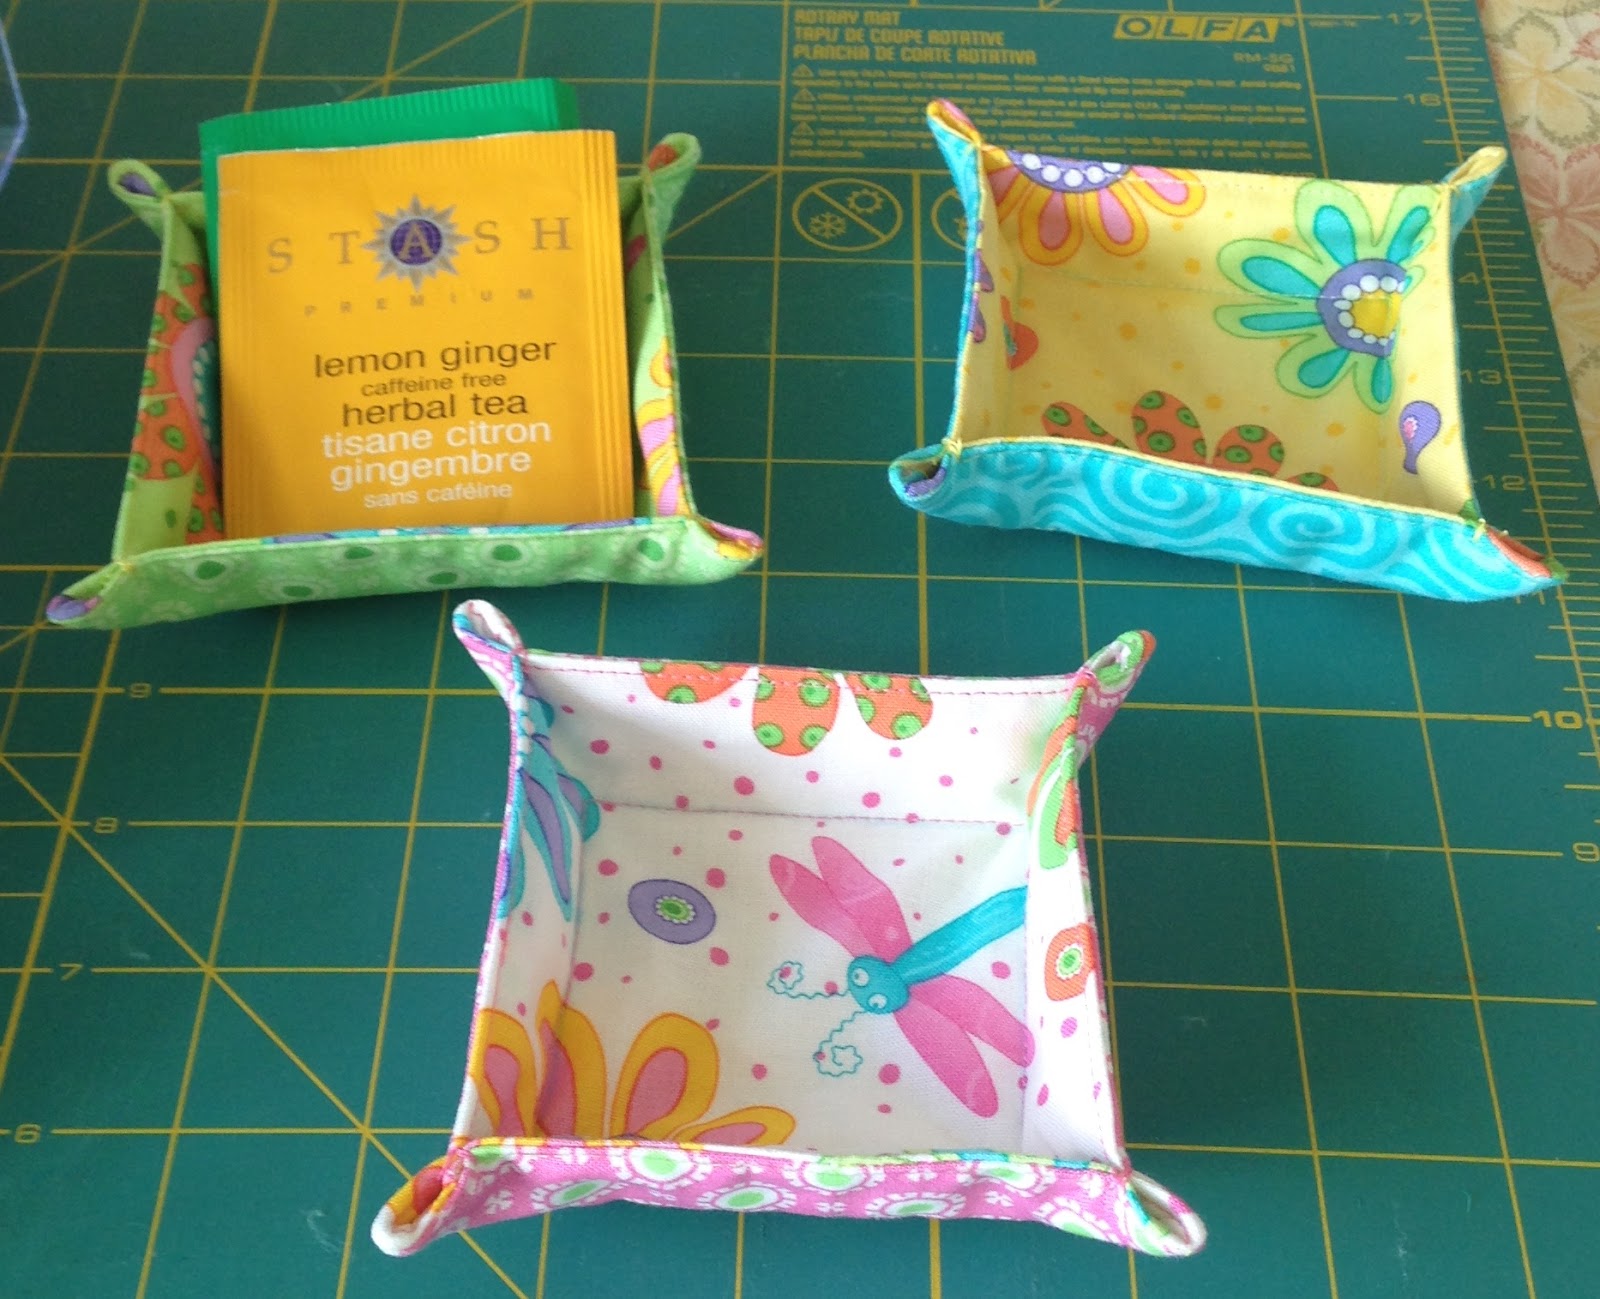
These trays are awesome! You can find the pattern here: http://aspoonfulofsugardesigns.com/2015/05/charm-square-fabric-tray/ and the same tray in a hexagon pattern here: http://aspoonfulofsugardesigns.com/2015/05/hexagon-fabric-tray/. I didn't manage to get the hexagon one done but they are both absolutely adorable! They take two charm squares, one piece of batting, some matching thread or floss and about 10 minutes of your time!
So I thought I would attempt my first tutorial this week. This tutorial is photo heavy so be prepared.
I have been quilting dragonflies lately and came up with a special technique that I used in the wall hanging above and in this customer quilt.


So I thought it would be great to demonstrate how to do this simple dragonfly as you are free motion quilting and without any straight lines. Here goes:
Dragonfly Tutorial
First, this motif looks best if you curl into it so find a place where you can make a nice bend or portion of a circle:

Then, as you continue the circle, form a pretty elongated tear drop on the end (dragonfly body) like this:

Work your way back up the inside of the dragonfly body to the top center and form a circle or oval for the head:

Now come out to either side (I did the left first) with an oval or tear drop (wings) and back to center:


Continue through to the other side with another tear drop or oval:

And other one overlapping the one you just completed:

Although it can be embellished with antennae if you like, I like it simple and choose to leave those off. You could also add interior designs to the wings and body if you like. In this case, I chose to closely echo the wings and head and end by echoing down the outside of the body and around to a new design.

So here is an idea of how this may work on a quilt. Stitch a few daisies, add a dragon fly in the center and head off to quilt a butterfly and maybe another set of flowers. Cute, cute cute for those spring and summer projects!

I love free motion quilting and love to teach it so I hope you enjoyed this tutorial. Let me know if you did so I know whether to do another in the future! Give it a try and join me at the link parties on my side bar and over at Crazy Mom Quilts here: http://crazymomquilts.blogspot.com. Have a great quilty weekend!
When I first saw your wallhanging I thought to myself that I needed to figure out how you made your dragonfly to see if I could FMQ it later. I was so happy when I read further and saw the tutorial. (I didn't pay attention to the title of the blog post when I started reading...oops!) The tutorial is great, thanks! Love the wall hanging and the little fabric trays too. I think I will add those to my summer sewing to-do list as those would be great to have on a coffee/tea bar!
ReplyDeleteI'll definitely be coming back to this one! Thanks, Penny!!
ReplyDeleteYour examples are super cute! Thanks for sharing your dragonfly method. The curves make it so elegant.
ReplyDeleteBeautiful work! Thanks for showing and telling. :)
ReplyDeleteBeautiful work! Thanks for showing and telling. :)
ReplyDeleteI love it! Thank you so much! I have been quilting (some for me some for others) on a babylock qcp on a grace gmq pro frame. As business has picked up some my wonderful DH gifted me a block rockit. It arrived yesterday. We are getting it set up on my frame. This would be an excellent design to practice! Blessings to you.
ReplyDeleteShelia. stitchedfromtheheart@yahoo.com
Wonderful tutorial, thank you for sharing. I would love to see more of them, you make it seem so achievable.
ReplyDeleteSmiles
Kate
cute lil dragonfly! I think I might try it on the borders of my dragonfly quilts. Thanks for the tutorial :)
ReplyDeletecute lil dragonfly! I think I might try it on the borders of my dragonfly quilts. Thanks for the tutorial :)
ReplyDelete