Friday, October 27, 2017

Linda's Feathered Star Quilt

When Linda first brought her Feathered Star Quilt for quilting, my first thought was "Oh my, how do I get myself into these situations?"  It is gorgeous and I wanted to do it justice!


I think it turned out lovely but it all started with Linda's ideas, plexiglass and a dry erase marker.  This is the process I follow almost every time a quilt comes in:  draw!


Many times it's just a brainstorming process and in this case we simplified the quilting in the blocks in the bottom photo substantially.

The quilting was done with 50 weight Aurifil thread and Hobbs Tuscany 80/20 Cotton/Wool batting.  The main thrust of the quilting was feathers and beautiful ruler work with Linda Hrcka's rulers from The Quilted Pineapple.  


I think it turned out beautifully!  I'll let the quilting speak for itself.


Linda is an awesome quilter and I am honored each time she trusts me with her jewels!  This is definitely one of them!

Enjoy your weekend and check out some of the quilty spots on my sidebar.  Hope you get to quilt soon!


Monday, October 9, 2017

Feathers on Rose-Colored Lamé

When we recently moved into our new home, I found this pile of fabric while organizing my new stash cabinet:


I'm pretty sure this is a very sheer lamé fabric that was purchased at a garage sale thinking it could be used for a whole cloth quilt.  The first question was what kind of needle to use.  So I resourced my awesome Bernina Q20 Facebook group.  It was suggested that I back, or stabilize, the fabric and use a ballpoint needle and give it a try.  After several months, I finally remembered to pick up a pack of needles while at the sewing store.  

First up, a test on a small piece of silver lamé with a sweet little feather:


It was so exciting working with something new, that I completely forgot to stabilize the fabric but I was thrilled with the results, using two layers of batting.  

So next, a whole cloth quilt on a beautiful piece of light rose colored lamé:


I wasn't too worried about this being perfectly symmetrical but I did locate and market the horizontal, vertical and diagonal points of the cut fabric and began working from there.  Here is the resulting center section:

That center section was completed primarily using these two rulers/templates from Linda Hrcka with The Quilted Pineapple and some gorgeous Floriani thread:

Not knowing exactly where it would lead, I ended up with this circular design:

There was still quite a bit of unquilted fabric so the circle was squared off with scribbles in the squares around the design and a grid was added behind the main design using my Line Tamer Ruler. from Four Paws Quilting.


Then, because it still looked a little empty, I added a little floral motif in each corner area using the grid, and echo'd it.  A small crystal was added in the project center and in the center of each of the four floral designs.   It was then bound with a teal colored piece of Cherrywood fabric.  The result? Feathers on Rose-Colored Lamé:


And the back:

This experiment with Lamé with fun and very easy.  I had no problems stitching with it, even with that heavy scribbling.  So if you are adventurous, try a piece of Lamé!

Have a great quilty week and try something new!!!

Friday, July 28, 2017

Debbie's Whole Cloth Quilt

It's been a long time since my last post.  Summer has been crazy with moving, hail, teaching and all the normal busy-ness that comes with this glorious time of year.  Quilting has for the most part been put on the back burner.  However, I HAVE finished this fat quarter-size wall hanging for a super special friend who asked for a whole cloth quilt for her birthday.


The fabric is iridescent Dupioni Silk.  I used a gorgeous floriani thread in Fuscia for the main design and 100 weight Micro Quilter from Superior Threads for the background quilting.  It was sandwiched with two layers of Hobbs Tuscany Cotton/Wool.  

My goal in putting this together was a lovely focal point surrounded by feathers.  Since my friend loves flowers, this rose was perfect.  I think the grid work really brings out the flower and love how this turned out.  Smaller whole cloth quilts can provide great satisfaction quite quickly.  

It's glad to be back.  I'll be showing photos of my new studio soon.  I'm not used to such a large space.  Have a super quilty weekend and check out the blogs on my sidebar!.


Friday, May 19, 2017

An Experiment

Now that I've taught the same beginning Ruler Work class many times and accumulated the same wallhanging from doing demos or preparing samples, an interesting experiment has surfaced.

In teaching over the past several years, questions have often risen regarding the necessity for quality batting and how two layers of batting affected the appearance of a quilt.

My hope is that you will find the following comparison quite interesting.
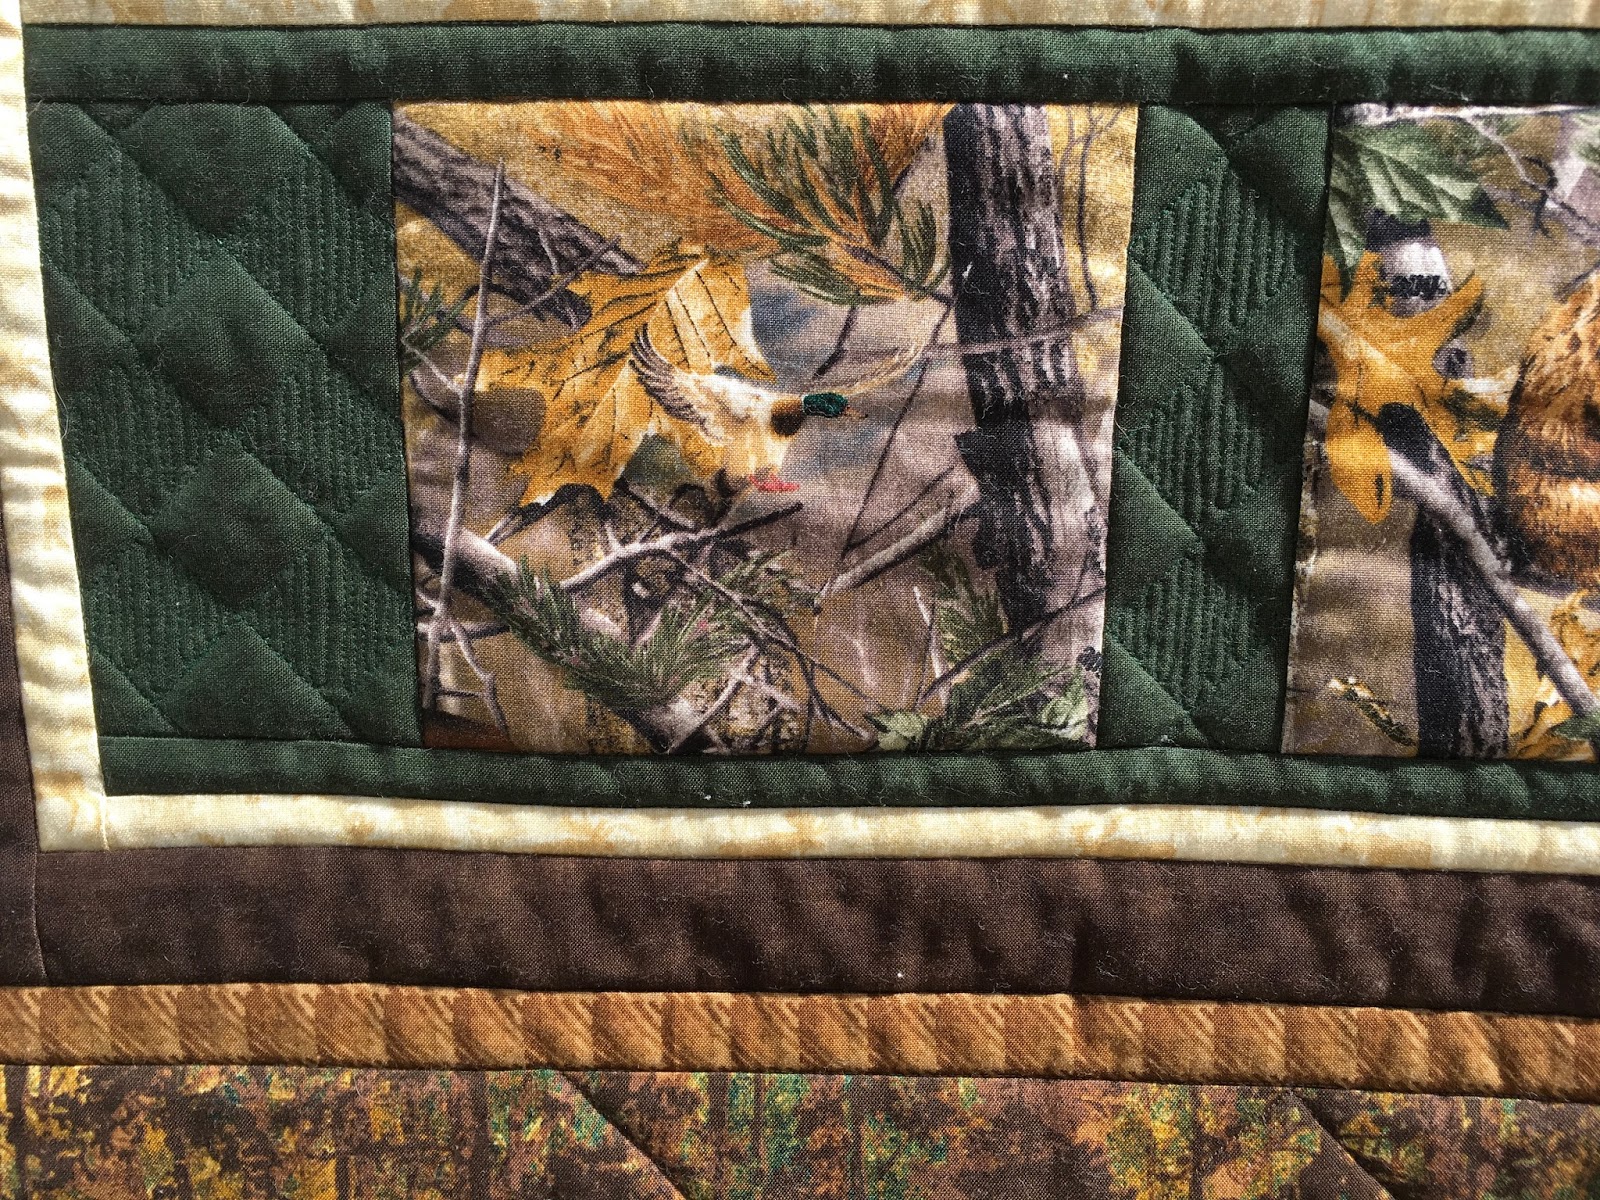
First sample
Batting - one layer of "I don't know what" given to me by the dealer
Thread - 50 weight Aurifil in a variegated color throughout
Embellishment to basic design - none
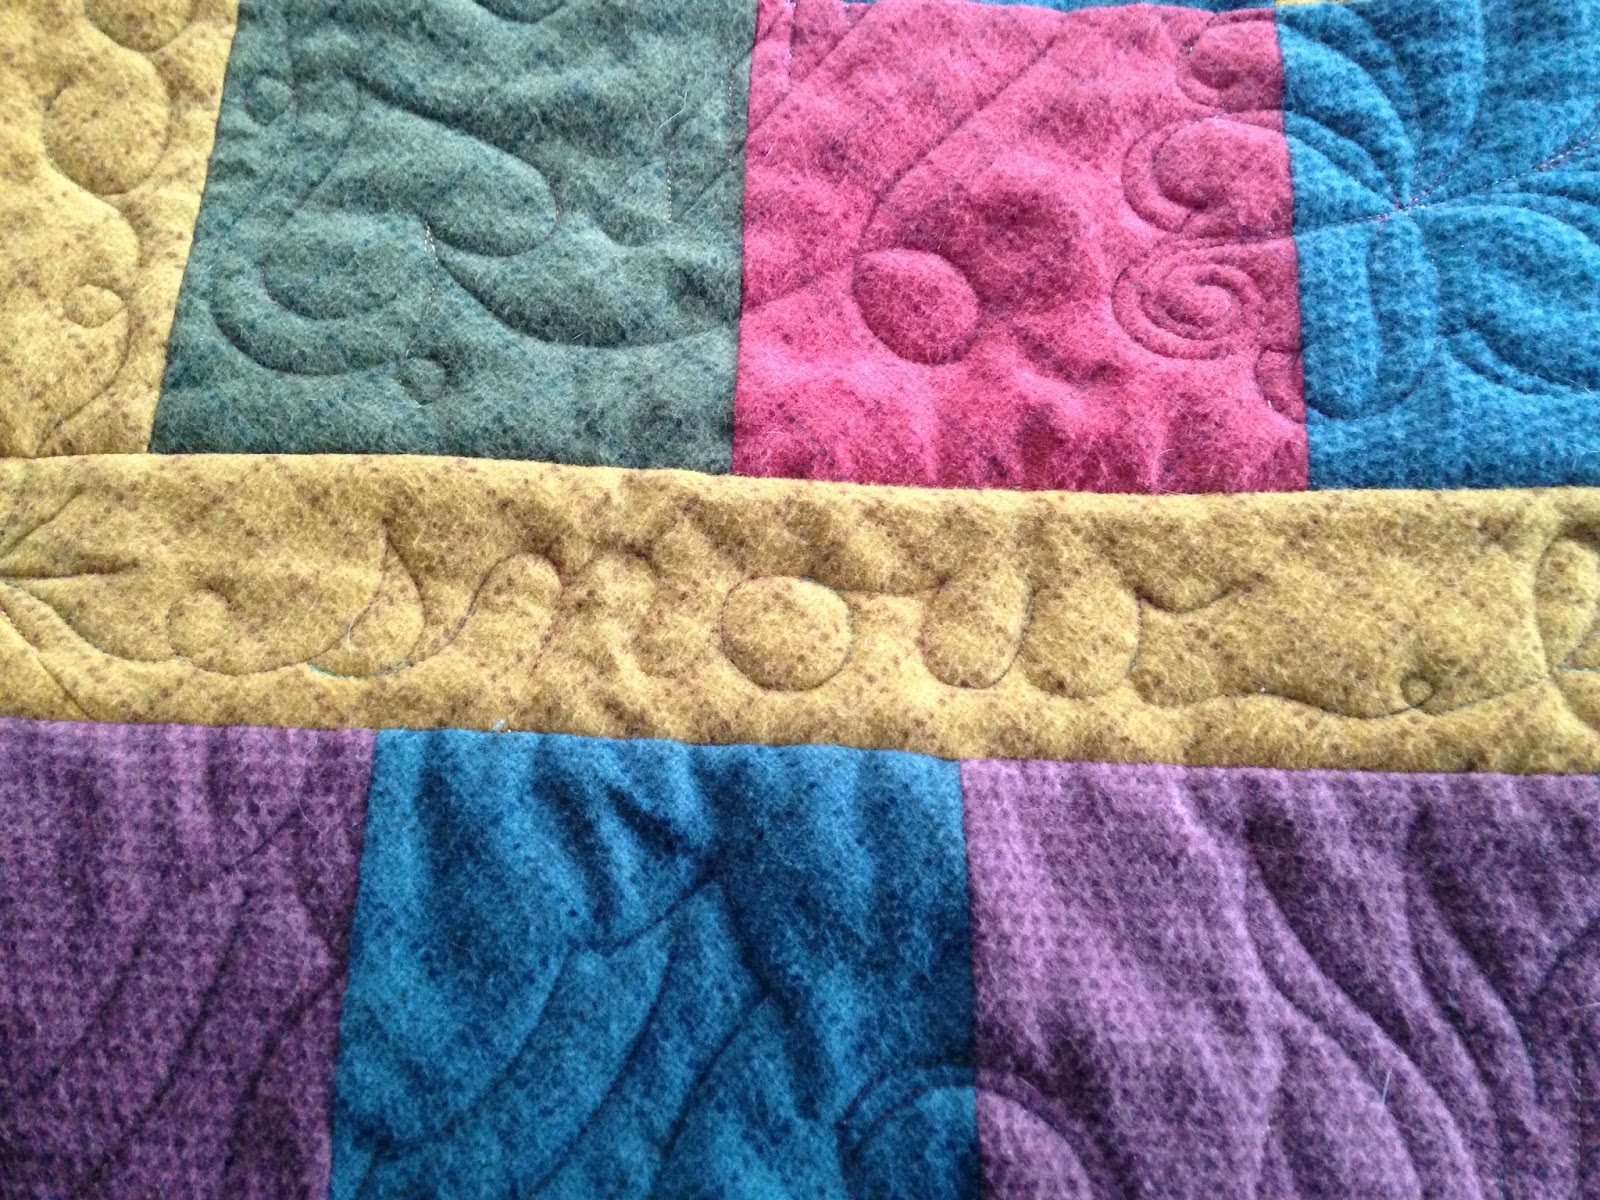

Second sample 
Batting - two layers of 50/50 cotton/bamboo
Thread - Isacord (40 weight) in purple, pink and lime green
Embelishment:  feathers in scallops 
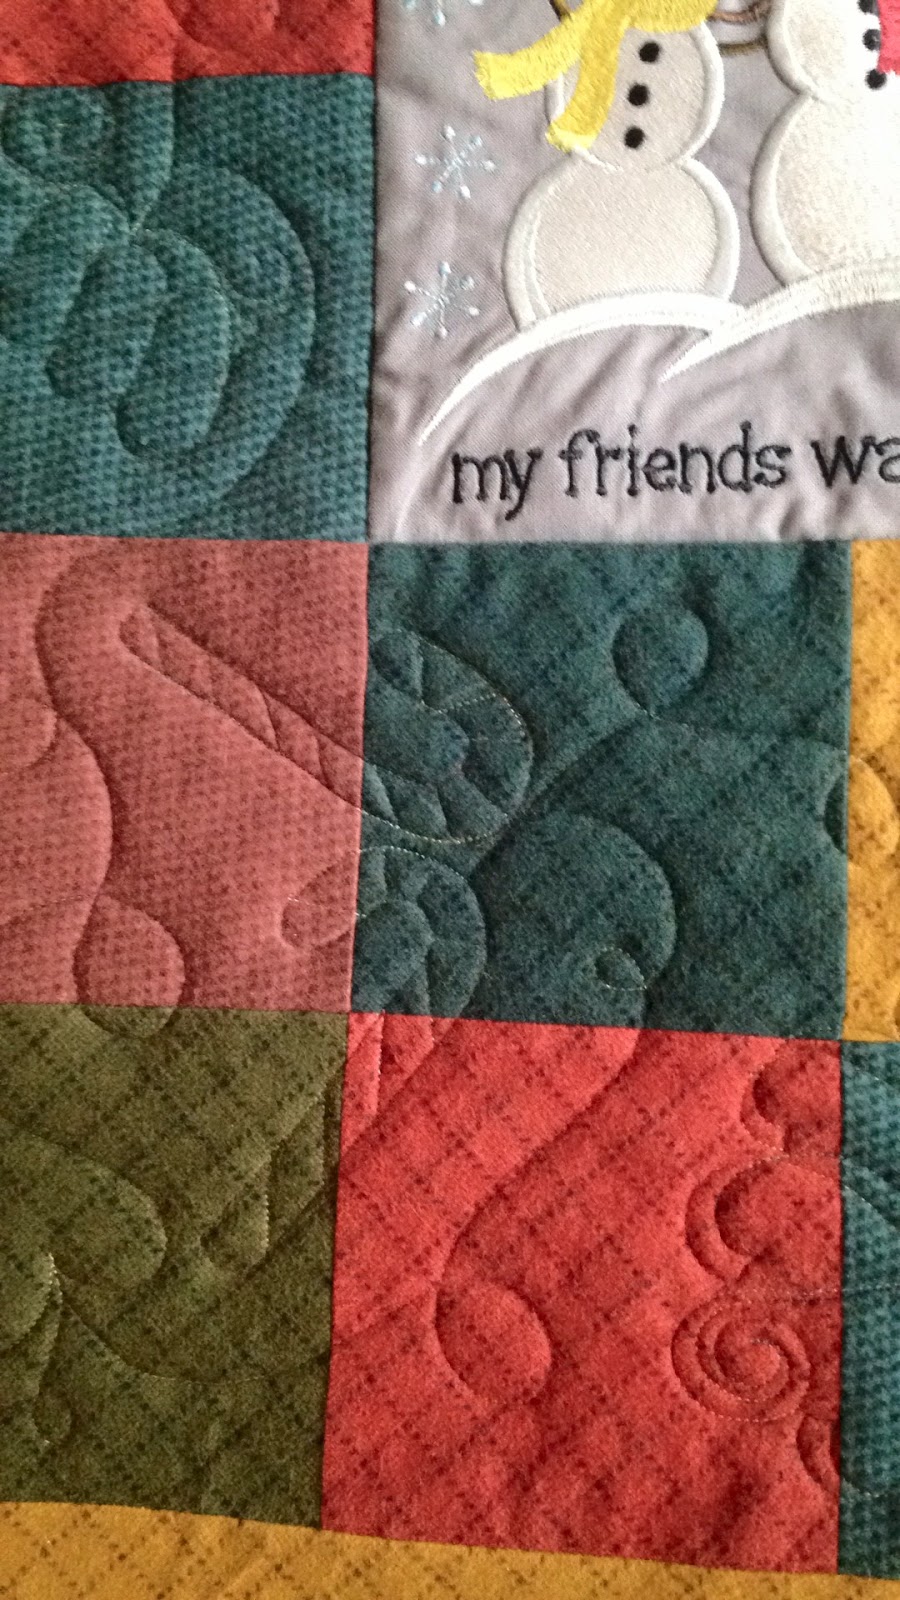
Third Sample
Batting - two layers of Hobbs 80/20 cotton/wool
Thread - So Fine (50 weight) by Superior Threads in Lavender, Turquoise and Rose AND 60 weight
               Bottom Line by Superior Threads
Embellishment:  Feathers in scallops, lines in flower & background squiggles in crosshatching and
                            border

Now, two of these projects have not been finished with binding and as beginning projects, they were not intended to include the additional and more difficult quilting.  However, it is still amazing the difference between the three samples.

Sample number one has no depth to it and the use of a beautiful variegated thread is somewhat wasted as nothing really stands out.  (Sorry, at the last minute I saw a couple of "blue line" marks on this)

Sample number two had a little depth but even with simple feathers, just didn't have any special character.  It was like looking at a flat map.

Sample number three, at least to me, had so much  more depth and character with the extra quilting in the background of the cross hatch.  The flower stands out a bit more too with stitching just one half of each petal.  Even the border has just a bit more character with the background stitching.  

So although we can complain when something is "over quilted", we can also see here how a lack of quilting can affect a project as well as the batting used.  It can take a scientist to get just the right balance of batting, thread and stitching!

Here is a photo of the two double batted projects side by side.

And a full view of all three side by side.

So, really no conclusions, just some pretty amazing observations.  I hope this helps you in your quilting!  Have a super quilty weekend!

Thursday, May 4, 2017

Blue Fairy Wall Hanging

What an incredible customer quilt!  I asked Rose how many hours she estimated she spent on all the handwork in this wall hanging.  Somewheres around 400!  Can you imagine?  


This little Fairy quilt is an original design and done all by hand other than adding the borders.  The responsibility for quilting a project of this caliber was truly incredible.

-  Quilt size:  approximately 29" square
-  Batting:  Hobbs 80/20 cotton wool (the customer used one layer behind the center medallion only,  
    when completing the handwork.  I used one layer to cover the entire quilt.)
-  Thread:  Superior Threads 100 weight Microquilter


So where do we start?  First I stitched around all of the handwork as if it were appliqué.  Then I stitched in the ditched around each section:  the medallion and each border.  Finally, it's time to start the good stuff!  The flowers around the bottom represent periwinkles, so we decided to continue the flowers in the bottom and up slightly on both sides.  The also went just slightly onto the dark blue border.


Up at the top we added a few butterflies and then several dense quilting designs.  The idea was to create a complete fairyland.


It's very hard to see but feathers were used in the dark blue border and worked around the periwinkles that extended into the border and the outside border was completed with a lattice grid design.  They are much each to see from the back side.

The quilting on this quilt took about 13 hours in total but it is well worth it.  Rose was thrilled with the finish and so was I.

Have a super quilty weekend and check out some of the links on my side bar!  Thank you for stopping by!

Friday, April 14, 2017

Rocky Mountain Elk!

I don't know if this panel was really taken from the Rocky Mountains but it just feels like it!!  Regardless, this is a gorgeous customer quilt that required a little more than the flowery beauty I love.  The photo was taken in our wonderful Wyoming wind so the borders look a little wonky but we had a hard time keeping the quilt flat.


The quilting started in the panel itself.  The goal was to create dimension and we did that on the double batting with Superior Threads 60 weight Bottom Line and as well as a little 100 weight Microquilter.  Not everything was quilted, just the elk, some trees, a little in the mountains, a few leaves, and the small spruce tree.  Just enough for dimension.


Then we moved to the three borders and stitched in the ditch of each one but using the finer weight Microquilter.  Next came the animal shots above and below the elk.  These were stitched in the ditch in the sashing area.  Rather than quilting on the blocks, the green sashing was quilted on a grid using an Aurifil 50 weight thread in hunter green. 


On to the outside border.  The quilting needed to be kept simple on the print but yet worth doing.  So we added a little more dimension and texture with a diamond effect using an Aurifil 50 weight thread in brown.  I really like how this turned out.


At this point the quilting appeared very sophisticated so we kept with that and just echo quilted twice inside the bear claw corner stone blocks.


I just love how refined this quilt turned out.  My husband and son REALLY want a quilt like this!


I hope you enjoyed Rocky Mountain Elk!  Enjoy your weekend!  Take a peek at some of the quilty sites on my sidebar and don't forget Finish it up Friday at Crazy Mom Quilts here: http://crazymomquilts.blogspot.com


Friday, March 24, 2017

Embroidery Snowmen!


It may technically be spring but here in Wyoming we are having a bit of snow so my embroidery snowmen are perfect!

Whimsical!  Whimsical snowmen!  With hearts and birds!  Love it!  All of the embroidered blocks were found on line at emblibrary.com.  Aren't they great?! Once I figured out how many great designs I could find that I loved, I pulled out graph paper and first determined the size of the finished quilt and what part of that would be the inner panel.  I decided upon a 4" grid so the finished embroidery blocks would be 8" and the flannel squares finished at 4".  Then I marked on the graph paper where to put the snowmen and the center heart block and placed the squares around the embroidery.  That was my pattern!  Aren't these guys incredibly cute??  They were stitched on my Bernina 770.


So now the quilting!  This is our new second quilt for the top of our bed during winter; it's designed for warmth and snuggling. So I used up the rest of my bamboo batting using just one layer along with a fun variegated 50 weight Aurifil thread for the quilting.  The first step was to stitch around the snowman blocks and around the larger elements in the blocks as though they were appliqué.  This quilt will be utilitarian and everything laid flat so I broke the rules and did not stitch around all the 4" blocks.  Now!  Let's just pull everything out of the hat that says winter, combine it with simple loops and go with it!

Candy canes!


Ribbon Feathers!


 Mittens!

A winter scarf!!


 Ribbon Candy!

Holly and Berries!


Groups of Stars!

I did something fun in the inner border and went all the way around with words I thought of with winter, snowmen and even Christmas.  Here are a few.  They were not marked; I just went for it.


The outside checkerboard border went back to using a variety of motifs but I stitched a vine and had them come off of the vine.  I just love the warmth and joy this quilt brings!

I hope you enjoyed my Embroidery Snowmen!

Check out some of the links on my sidebar and don't forget Crazy Mom Quilts at http://crazymomquilts.blogspot.com!