Friday, March 25, 2016

The Dragonfly Quilt

The Dragonfly Quilt!


I love this quilt!  Absolutely love this quilt!  I guess that's because not only is it gorgeous but I quilted it and have never had so much fun in my life completing a quilt for a customer.  

When Linda first brought me The Dragonfly Quilt, I thought it was gorgeous but I was also overwhelmed.  How am I to quilt this?!?!  Linda was a new customer who came to me after seeing this quilt done for her friend Bea:  http://pennyquilt.blogspot.com/2015/08/asian-feathers.html.  I had already done a couple of quilts for Linda but nothing like this! 

The Dragonfly Quilt is the first quilt in which I used double batting.  Linda was kind enough to allow me the option after I showed her these photos.  Mimicking what was eventually planned for the quilt, the quilting in the top photo was completed using double batting.  The quilting in the bottom photo only used a single layer.  The difference is actually quite dramatic.   Although normally the top layer would be wool, we chose to go with both layers in 50/50 cotton bamboo.  


Inspired by the quilting of Judi Madsen with Green Fairy Quilts, this is the transformation that took place with The Dragonfly Quilt.  


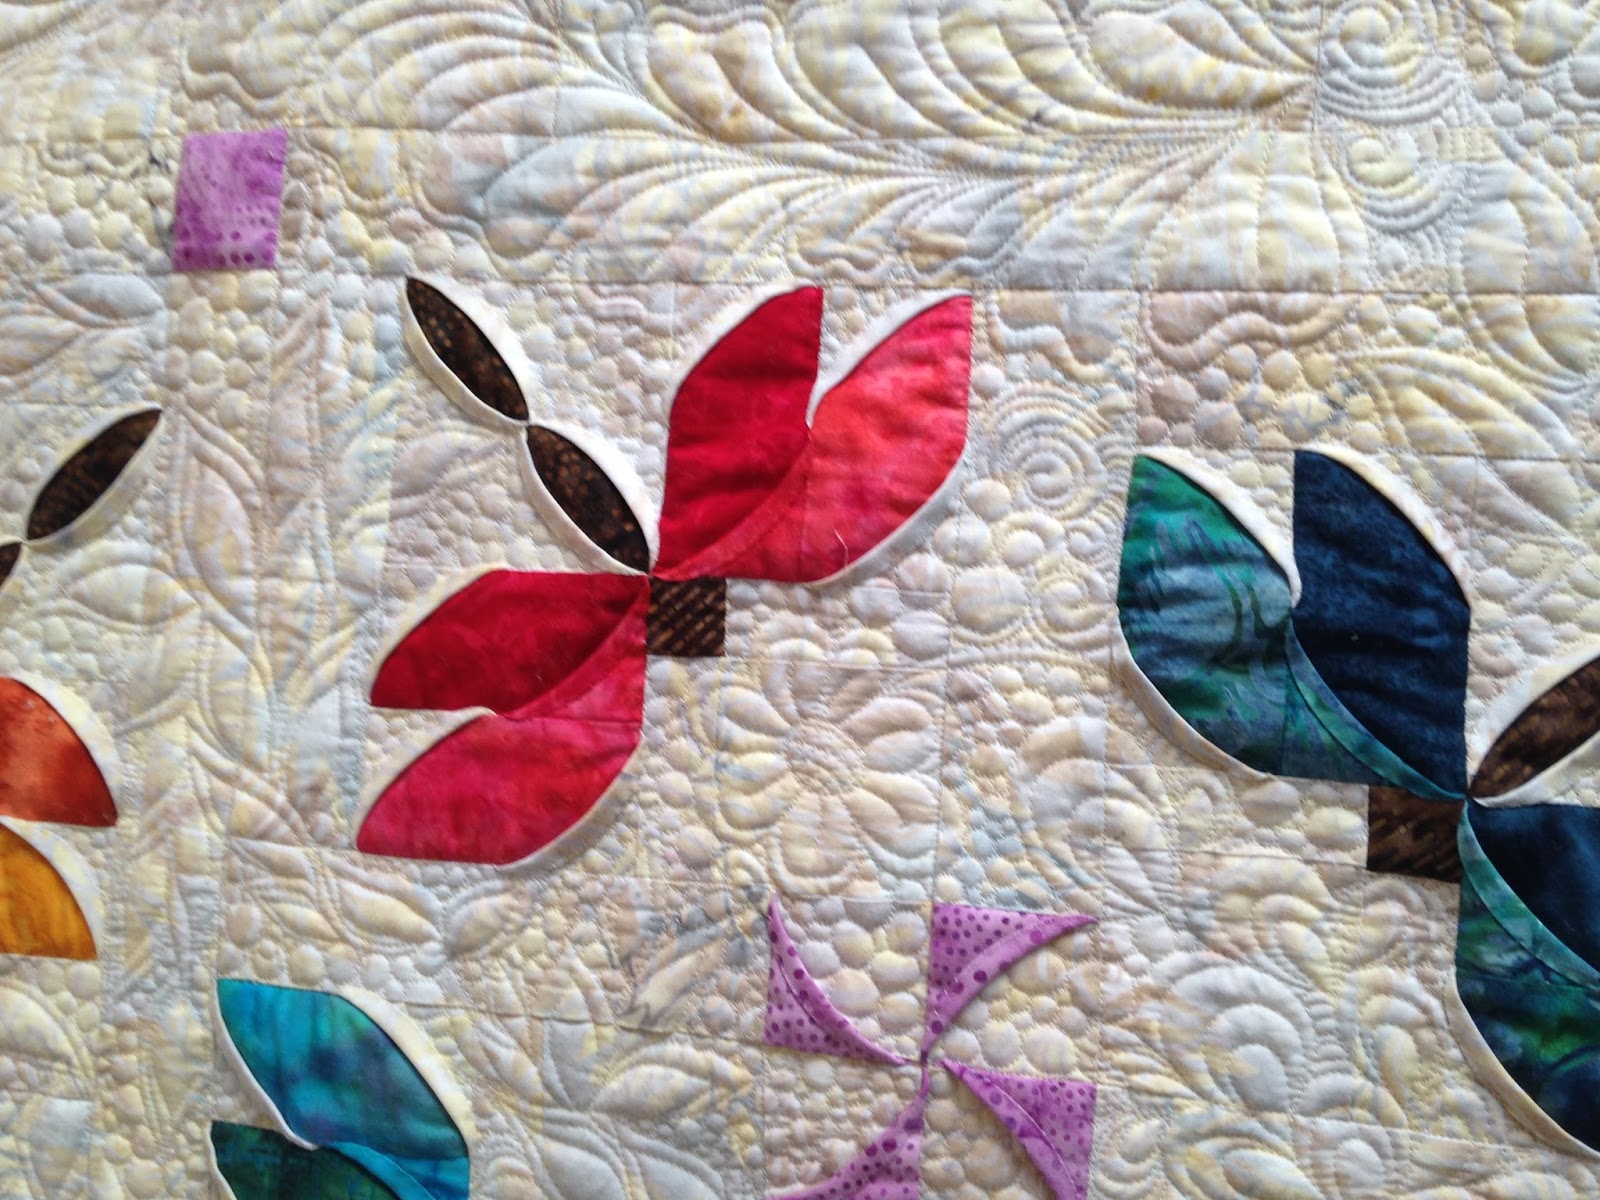
After I stitched in the ditch over the entire quilt,  I started in the center portion of the quilt using Bottom Line 60 weight thread by Superior Threads in cream, in both the top and bobbin thread.  This would prevent any unsightly thread build up.


From the center I moved to each corner area.  These were really fun! The body of the dragonflies and butterflies were taken from Judi Madsen, but done freehand; the wings were derived from other photos viewed on Pinterest.  


What I call pansy feathers were centered around the inner edge of the quilt to begin a break from the intense quilting.


And finally, "pin stripes" and soft corner feathers on the outside edge to bring the quilt to a calming rest.


And that's The Dragonfly Quilt!  The quilt measures approximately 50" x 50" and will be used as a wall hanging.


I am so thankful for the challenges and opportunities Linda gives me to increase my abilities and I fully enjoyed quilting The Dragonfly Quilt.  I think she likes it too!

Have a great Resurrection Weekend and join me at Finish Up Friday here:  http://crazymomquilts.blogspot.com as well as the links on my sidebar for some quilty inspiration!

Friday, March 11, 2016

Pillow Shams for Texas!

I am so excited to show this somewhat unusual Finish up Friday project (at least unusual for me).  Things are winding down on two commission quilts/bedspreads being completed for a customer who lives in Texas.  All that is left to do is the hand work for the binding.  Since my customer has seen photos, I thought I would show one of the two king-size quilted pillow shams she asked I make to accompany the quilts.

This is Moda Blackbird designs fabric and is stunningly gorgeous.  This particular fabric is also the binding for the quilts.  Each sham is completed quilted, front and back with feathers.

There is a 2" double stitched flange on each side and on the top of each pillow sham as well.


Rather than a back envelope opening, a bottom button closer was requested.  There are four buttons spread out across the bottom of each pillow sham.


The seams of the pillows shams were finished with my serger to provide a quality product.

This was quite a different project for me but I have already been asked to make shams for another client.  They are truly quite finished in appearance with the bottom button closure.

Hope you enjoyed something different!  I'll be linking up over at http://crazymomquilts.blogspot.com for Finish it up Friday as well as some of the parties on my side bar.  Come joint the fun!

Friday, March 4, 2016

Multi-pocket Ruler Pouch

Last week I posted about this ruler pouch I designed and made from scraps for my large rulers:

This week I decided to make a multi-pocket pouch for my smaller rulers.  My problem was the varied sizes.  I had these 8 1/2" rulers.


These 6 and 6 1/2" rulers"


and these 2 1/2" and 4" rulers

I wanted to have everything hanging together but still have every ruler showing out of the pouch so I knew what I had. 

My goal this time was to use my 2" square scraps.  So I laid out the largest of each set of rulers side by side with a little room between each set.  That gave me the length (or width) of how long the pouch should be.  I then made it about 10" high to accommodate the 8 1/2" rulers.  

Once it was made, I stitched vertical lines between where each set would go.  For the 6" rulers I stitched a horizontal line the width of that area, about 2" above the bottom of the pouch.  For the smaller rulers, I stitched a line about 1" below the top of the pouch so even the 2 1/2" ruler would show.  Here's what it looks like completed.


I love how it turned out.  As you can see, all the rulers stick up from the front pouch so I can see what I have.  Another great finish for me!

Have a fantastic weekend!  Come visit some of the links on my side bar and see what the quilty community is up to.